Fish are one the most inexpensive pets you can own. They are easy to manage, stunning, and many have their own personality. However, to keep these little beings happy and healthy, you need to be extra careful in setting up a safe and comfortable tank for them.
In this guide, we will share a few easy steps on how to get your freshwater aquarium ready to home fish!
Step 1: Place and Set up
The most important thing is to select the perfect spot to place your aquarium. Make sure to place your aquarium away from direct sunlight. Direct exposure to sunlight can promote algae growth and heat up the environment excessively – both harmful effects for the health and safety of your fish.
Make sure that your aquarium is placed firmly on level ground. Use shims to support and stabilize the aquarium if necessary. Taking precautions to ensure the stability of the aquarium can help prevent avoidable mishaps like stumbling against the aquarium and knocking it over.
Step 2: Gravels and Ornaments
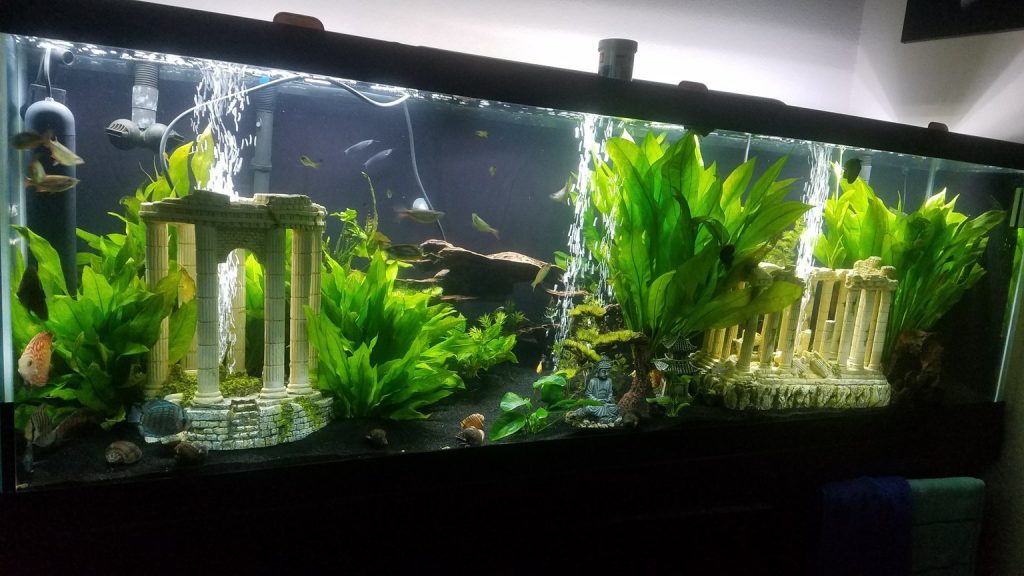
After making sure that the aquarium is not wobbly and it is standing firmly, go ahead and decorate it. Ornaments like artificial corals, rocks, driftwood, and other items not only make your aquarium look spectacular, but they also give your fish places to hide, rest, and even play. Be sure to research what substrate would be best for the future fish you plan to put into your tank.
It is best to make your freshwater aquarium as comfortable and cozy as you can, so your fish stay happy.
Note: Before adding rocks, gravels, and other ornaments rigorously wash them with warm water. Avoid using any type of soaps or detergents as they are extremely toxic to the fish.
Step 3: Water Level
Fill the aquarium with clean water at room temperature until the level reaches three-fourth of the tank. To keep the gravels and decors in place, you can place a saucer or plate over the gravel and pour the water directly on it. This dampens the impact of water on the things.
Regular tap water contains chlorine that is harmful to the fish, which can hurt or even kill your fish. Therefore, make sure to use a water conditioner to de-chlorinate the water before filling your aquarium with it.
Step 4: Fish Filter
The filter is a must-have in any freshwater aquarium. It not only keeps your fish’s water clean but also aerates the aquatic environment so the fish can breathe comfortably.
There are three types of filtration commonly found in aquariums:
- Mechanic Filtration: The first level of the filtration process. It is used to remove the buildup of toxic waste from the aquarium. Ex. (Hanging filter/pump, canister filters)
- Chemical Filtration: It is used to maintain the water quality by removing dissolved particulate matter through resins and activated carbon.
- Biological Filtration: Certain microorganisms and bacteria break down harmful ammonia, converting them into less toxic products and thereby reducing the overall toxicity levels of the aquarium.
To install filters:
- Load them with filter cartridges or material.
- Station them as per instructions.
Note: When cleaning pads or sponges, do not clean with tap water as bacteria will die, use a 5-gallon bucket filled with tank water and thoroughly clean in tank water, this will ensure the media is cleaned and bacteria survives!
Step 5: Aquarium Heater
An aquarium heater is vital to have in freshwater aquariums. A heater ensures that the aquarium has a comfortably and consistent temperature throughout the day and night.
The Ideal location to place an aquarium heater is near the maximum water flow. Place it horizontally towards the back of your aquarium, some inches above the gravel to ensure optimal heat dispersion throughout the water. Ensure no fish can make direct contact with the heater to avoid any burns to the fish (Many heaters include or are designed to be directly in the tank but always be sure).
Step 6: Air Pump
An air pump in the aquarium is essential to keep the water oxygenated and help your fish breathe easily. It also helps ensure that the water is evenly heated. It also should help with water clarity!
Place the air pump closer to the top of your aquarium (water level). This way you can prevent the water from running back into the air pump, in case of a power outage, if placed below the aquarium. If your air pump is placed above the aquarium, you can place your air stone lower in the aquarium for more water circulation.
Step 7: Monitor Water Conditions and Start your Water cycle
Add ammonia to your tank and beneficial bacteria (check bottle dosing instructions) to begin your water cycle. For a more in depth look on the water cycle check out our other blog post! Make sure to check the water temperature and conditions (Ammonia, Nitrite, Nitrate) at least twice a week. There are several important components in aquariums, such as filters, heaters, pumps etc. and any malfunctions can have an adverse effect in the water conditions. This process can take anywhere from 2 weeks to 2 months.
It is also prudent to check pH levels and hardness of the water via a testing kit to make sure your fish are living in optimal conditions and safe from harm.
And Ta-da! Your aquarium is now safe, equipped, and all ready for fish.


